
So I was speaking with Jake from http://cadianshock.com/ (a great guy and great blog for all sorts of hobby tips!) about how coming round to painting my Imperial Knight for my War Convocation was quite intimidating as I have never painted something quite so large before. I am not a confident painter at the best of times but hopefully it will turn out ok when I get round to it!
However I mentioned that my Imperial Knight was magnetised and I offered to Jake to do this post as he has not built his own Knight yet and magnetising can be just as intimidating and I thought this might help! Hopefully this will help not just Jake but any of you looking to magnetize your models. I have also magnetised a few other models (Onager Dunecrawler, Kataphron Destroyers, Exocrine/Haurespex) so please comment below if you would like me to do similar posts on them!
Step 1
First step is to build the entire legs to waist section of the model. You don’t need any magnets for this bit so just build it as per included instructions with the model!

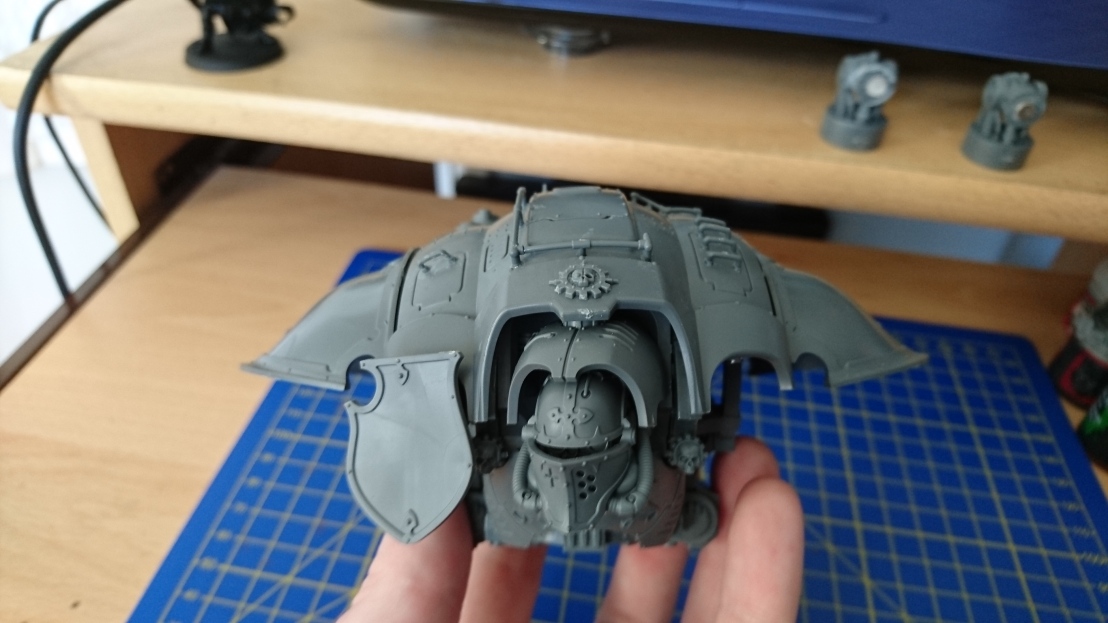
Step 2
The next step is to build most of the Torso. As you can see in the picture below I have completed most of the model as per instructions. The instructions tell you to put the Shoulder pads on fairly near the end so don’t worry about the at this stage.
However! Some key things at this stage are:
A) The shoulder joints. We don’t want to glue these in as they have a twist a lock mechanism so you can pull them off the main torso at anytime. You can see the shoulder joints in the background of the photo.
B) Don’t glue the Heavy Stubber/Melta gun on the left hand side of the torso as we can easily magnetize this.
Step 3
So now we can add our first (of many) magnets! So for this section I used 3 x 1mm N42 magnets which you can find easily here: e-magnetsuk.com
One thing to get started with is make sure you glue the magnets on the right way round! A useful way is to get a black marker and mark which side to glue! Also in this instance I have been using Super Glue rather than plastic glue.
So here we will be magnetizing the Heavy Stubber and Melta Gun to attach to the Knight Torso. This is fairly easy as to start with just build both guns in their entirety. The more complex part is that they would normally slot up through the hold where the little hook is in the picture below. However instead if you glue the hook piece on without inserting either gun, glue a magnet over the whole, and then glue a magnet on where the melta or stubber would attach, then hey presto you have magnetized the first weapons on the model!


Step 4
The next step is the shoulder mounted Icarus Autocannons or Missile Launchers. Again this is fairly simple. As you can see below I glued a 6 x 1mm N42 magnet on the top of the shoulders where you would normally glue the weapons to. Again just build the 2 different weapons fully and attach a magnet to the underside and boom! The top weapons are magnetized! Now I know there are 2 missile launcher front piece variations, you could find a way to magnetize this but frankly it seemed like too much work for me so I just picked the one I liked the look of and glued that on!


Step 5
Now we get to the more complicated section! To begin with take the shoulder joints and you will need to cut some off the tip where the weapons would usually glue to so you have a nice flat piece to work with. Then glue a 6 x 1mm magnet to each.


Step 6
If you have bought the Knight Gallant/Crusader then you have some more simple builds for weapon options! You can know build the whole Thunderstrike Gauntlet, Gatling Cannon and also the Reaper Chainsword from the regular Imperial Knight kit. With a little green stuff (helps with keeping them in place and glueing them over holes) and some more 6 x 1mm magnets you can simply attach them to where you would normally glue them to the shoulder pieces! Easy!
Thunderstrike Gauntlet


Gatling Cannon


Reaper Chainsword


Step 7
We are on the home straight, but there are now some really tricky corners to navigate before we cross the finish line!
The complication is that both the Battle Cannon & Melta Cannon are built from the same main piece. So to begin with build the back section of the gun, attach a magnet to the top, and the front as shown in the pictures below. However you also need to attach 2 3 x 1mm magnets to the right hand side approximately where shown in picture 1 (I used 2 on top of each other as 1 didn’t seem to have the strength to hold the other pieces on) and then 1 3 x 1mm magnet on the other side. It is easier to show you than explain so look at the images below.


Then you will need a big hunk of green stuff to put magnets in the front section of both guns. Again see the picture below.


Finally you need to again use a liberal amount of green stuff and 3 x 1mm magnets to put them on the inside of the ammo box, fuel tank and little box on the other side. Again look at the pictures below to help you find where to put them.


Conclusion
Once this is done you should be able to build your Knight any way you choose! Let me know how you get on and if you have any questions that I can help with!


I have seen this thank you! I need to read it properly and digest!
LikeLike
Hopefully it is helpful! It was quite hard to describe what I did as it was quite a while ago but hopefully the pictures help more than my explanation!
LikeLike
I am all read up now thanks! I think I should be OK, I did my Baneblade too, this looks a little more complex though! https://www.instagram.com/p/BRUEcuaADDx/?taken-by=cadianshock
LikeLike
That looks great! I have to say most of it is fairly straightforward. The only really complex bit is the melta/battle cannon that are made out of the same Base parts unlike the rest of the weapons which you can build seperately. Good luck!
LikeLike
Yes I think this is the hardest part, because of the way it uses the main body of the gun for both weapons. If you have not already, you should really listen to this http://chapterapproved.com/podcast/imperial-knights-queen-bee/
LikeLiked by 1 person
Nice write up! I’ve seen a few people do this for their knights and it looks like it works well, but for all the weapon options, it seems like a lot of work 😀 I have the two knights from Renegade to build and will look back at this for what I may do myself
LikeLike
Thanks Joe, it does work really well and to be honest it’s not too bad apart from the melta/battle cannon split. I split the renegade box with my friend so I only had one sprue for the paladin weapons, if you have both it is probably easier to build one complete melta cannon and one battle cannon seperately rather than magnetising them both.
LikeLike
What is the green stuff your using?
LikeLike
Just usual GW green stuff (very old mind you!)
LikeLike